See this use-case live on our sandbox environment here: https://radbee-sandbox.atlassian.net/wiki/spaces/GPMO/pages/218071178/Jira+Issues+-+3
💡 Our sandbox is on Cloud, but as Jira Snapshots functionality is the same as in Data-Center, the sandbox is useful also for Data-Center users.
How to Do It:
-
Log in to Confluence, and create a new page for the sprint report.
-
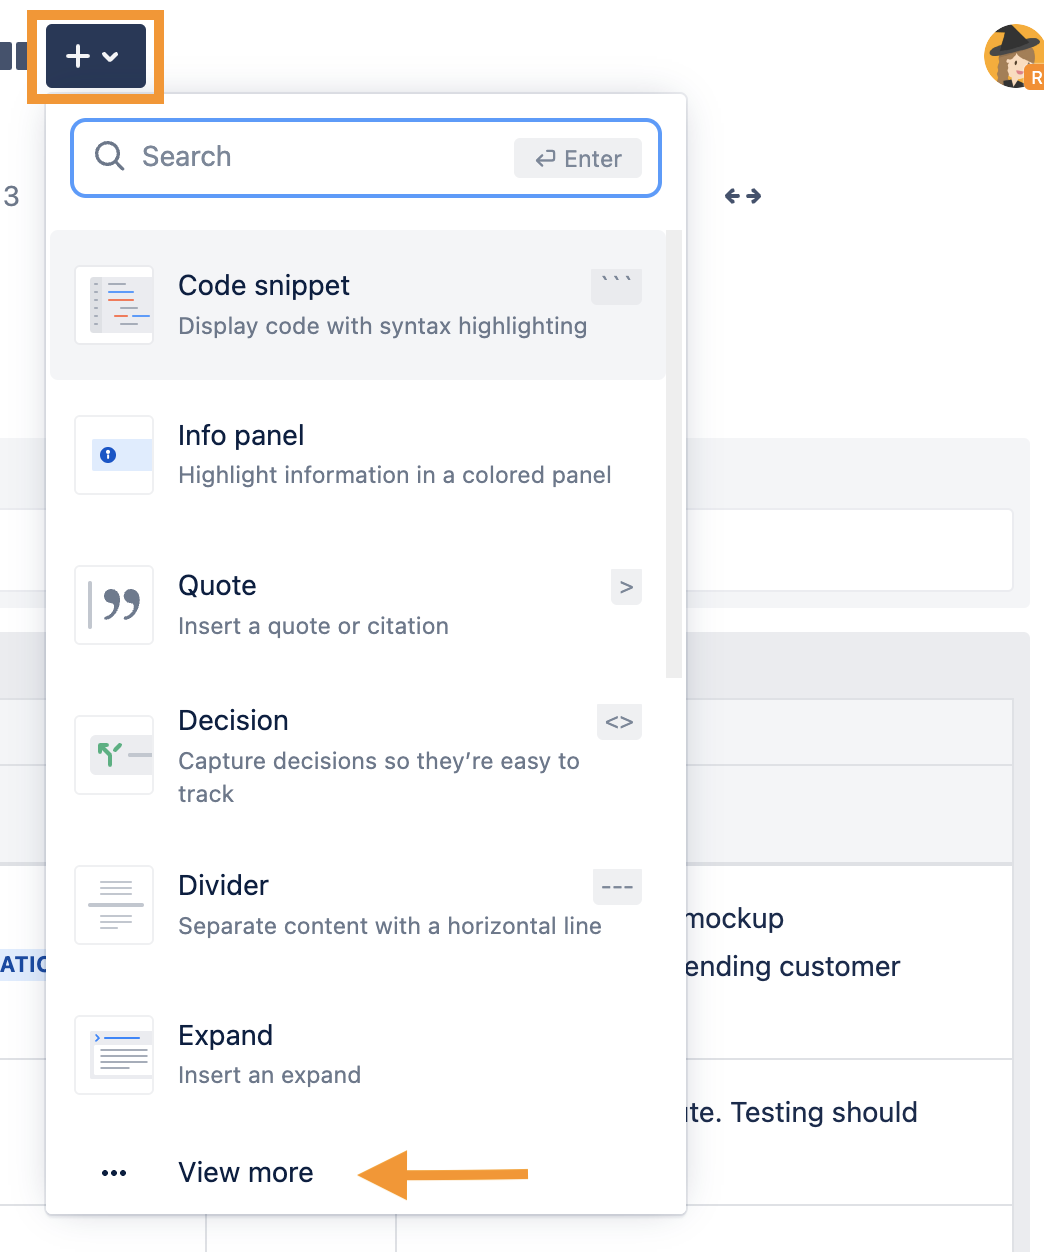
In the top editor toolbar, click the “+” icon and select “View more” at the bottom of the menu.
-
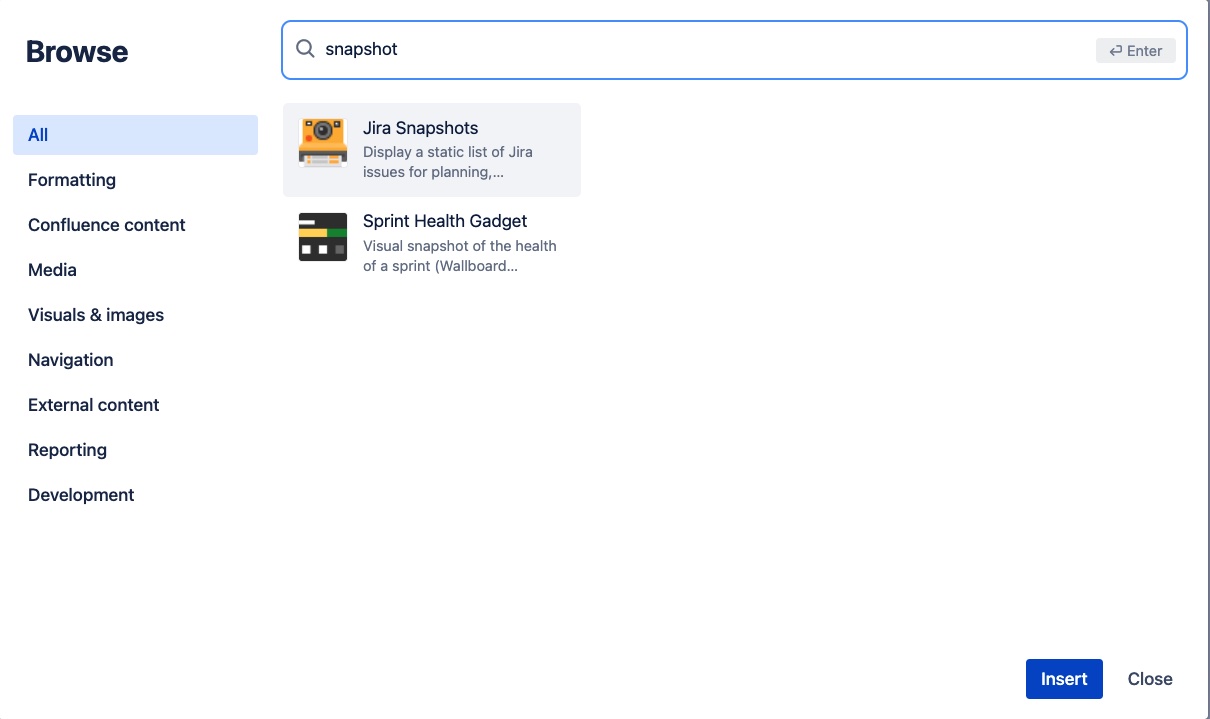
In the overlay, select the “Jira Snapshots” macro. You can find this macro via the search box at the top right.
-
In the “Edit Jira Snapshots Macro” overlay:
-
Enter a title in the “Level title” field, like “Sprint issues”.
-
Enter a query in the “Search JQL” field to limit the scope of issues to those of the sprint. This query selects only the issues in sprint “3”
Sprint = 3 order by created DESC
-
-
You may use the “preview” icon to verify that the JQL search returns the expected results
-
In the “Add fields to display” field, select the list of desired fields.
-
-
-
-
Click the “Save” button at the lower right, to complete the macro configuration.
-
Click the “Publish” button at the top right of the page.
-
Finally, click the “Create controlled snapshot” button, to generate a static list of issues.
The Finished Result:
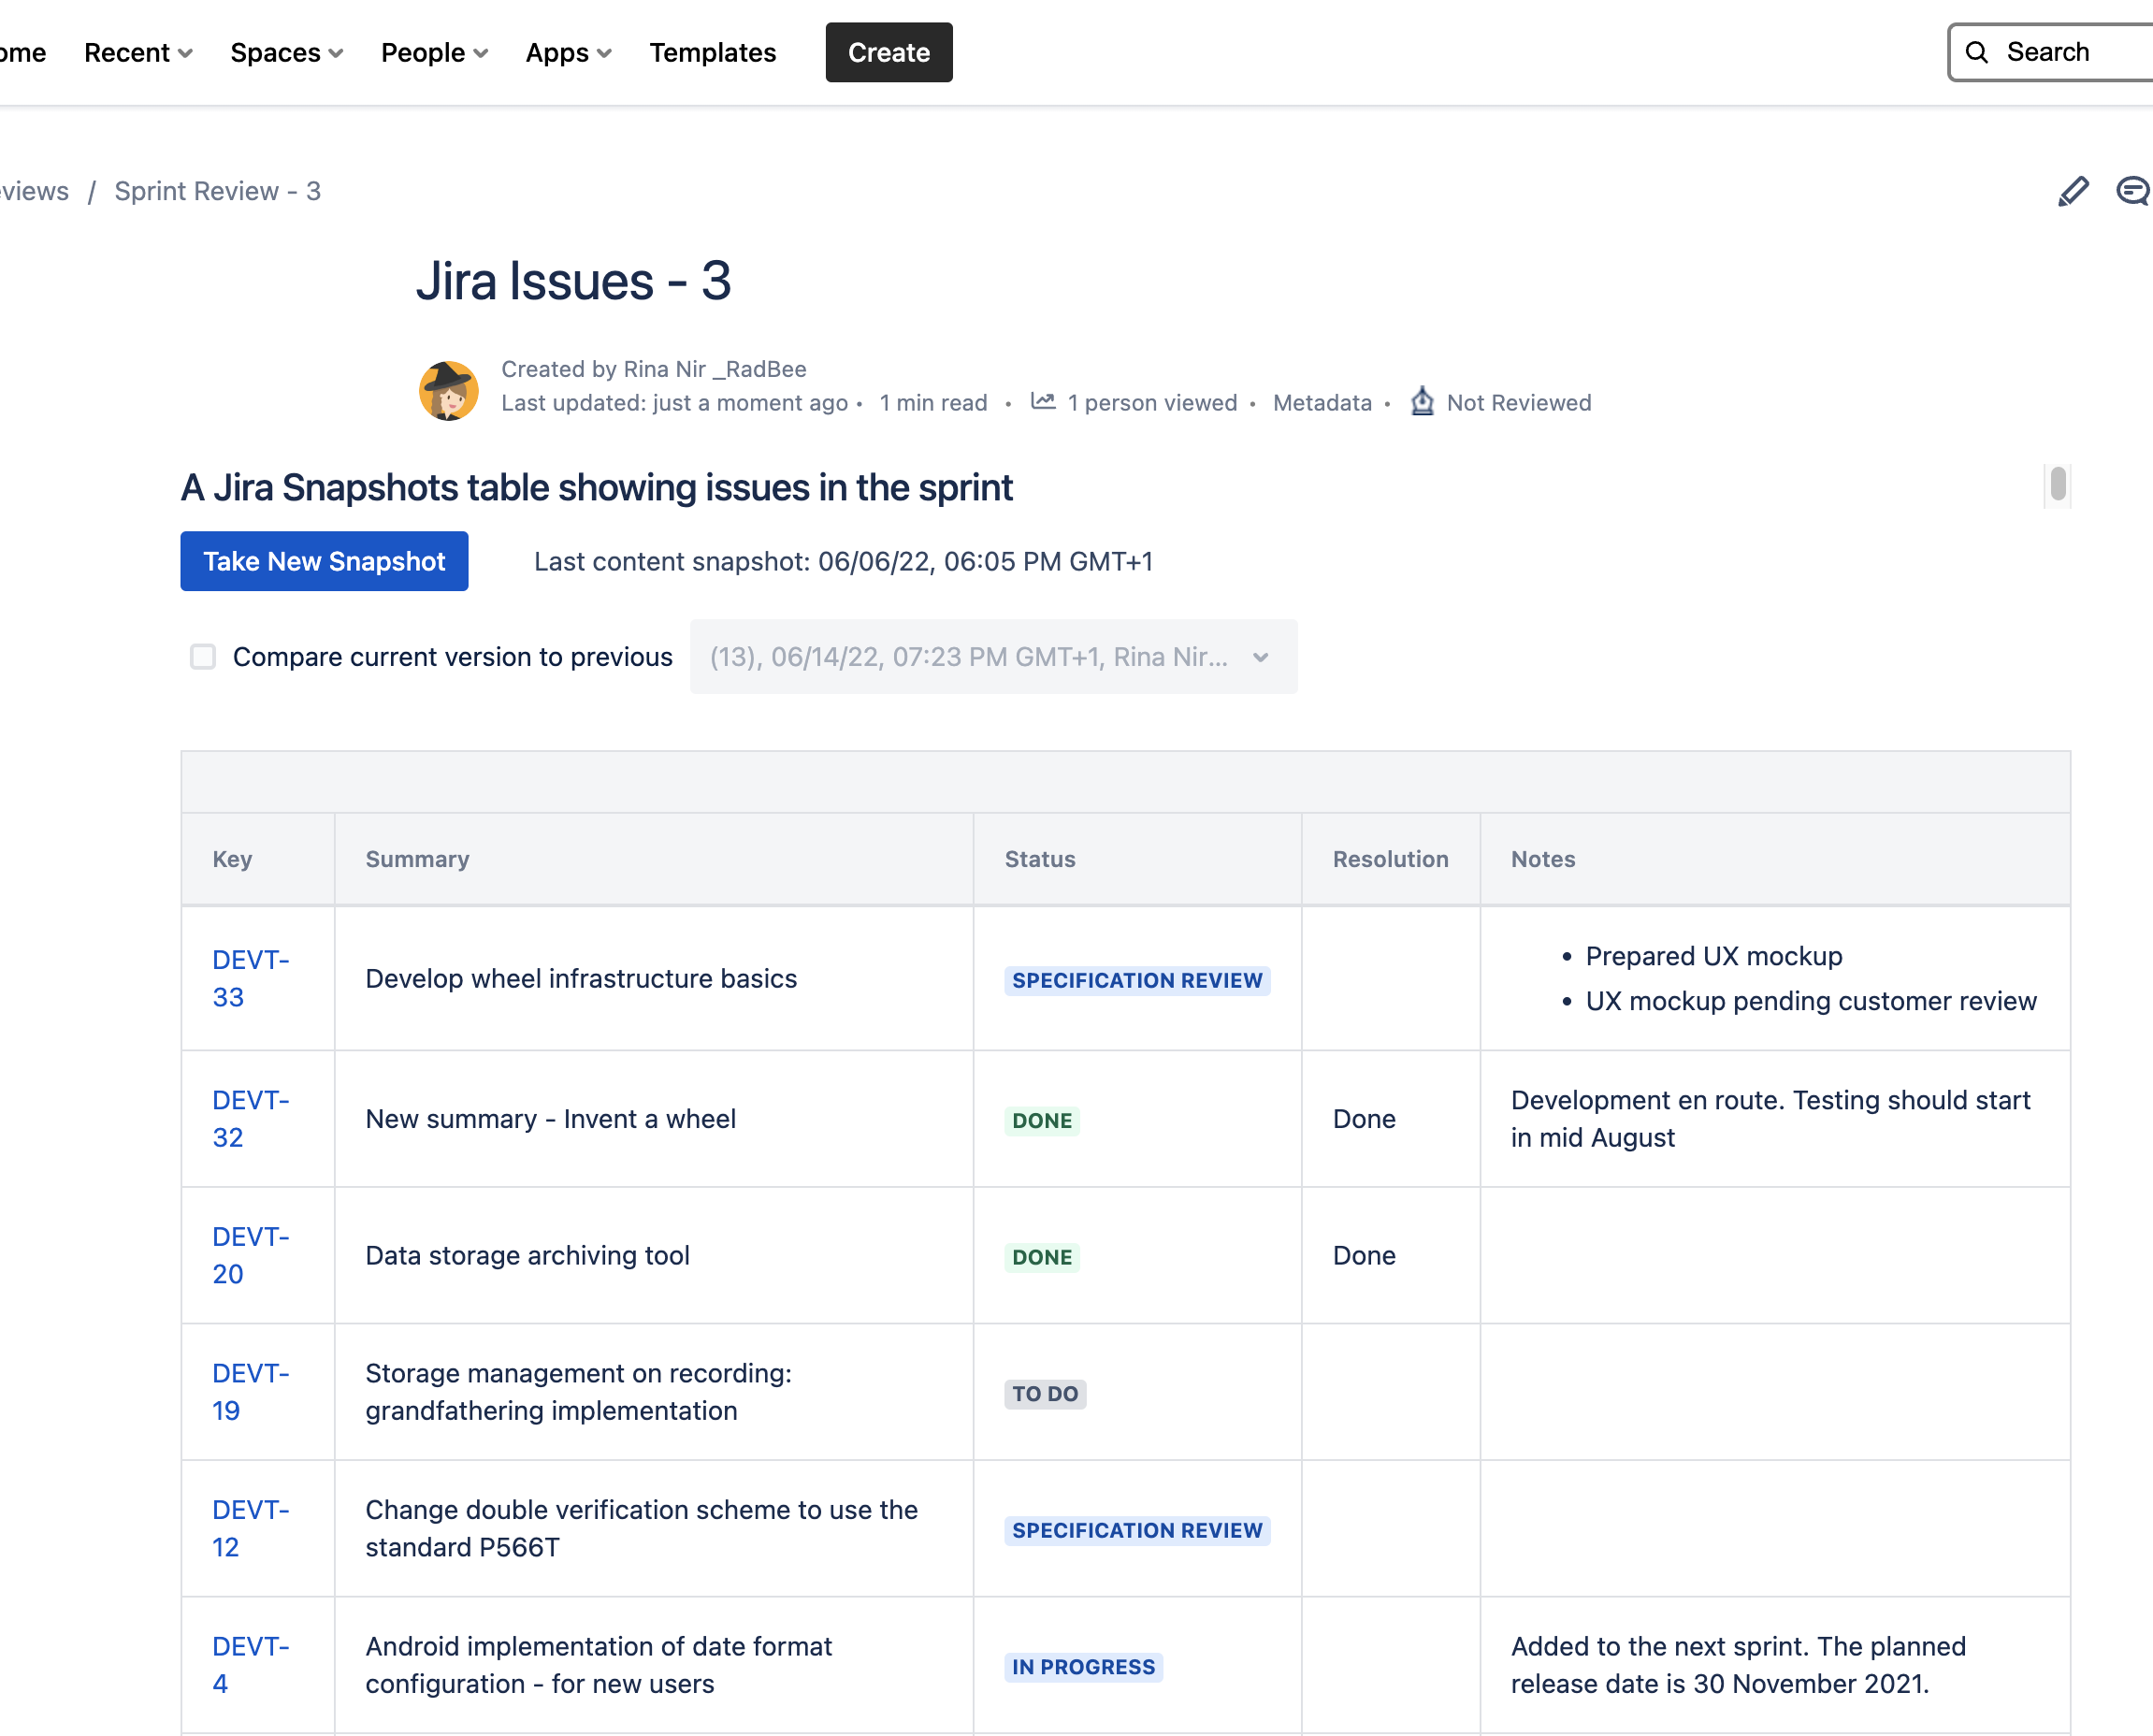
Need to change the issue list or display different information? Simply edit the macro details, and click the “Update” button on the Confluence page to take a new snapshot.
Now that there’s a trackable history of the sprint content over time, there is no longer debate about what was originally in the sprint.