See this use-case live on our sandbox environment here: https://radbee-sandbox.atlassian.net/wiki/spaces/~209251919/pages/81362969/Status+Reports
It’s Friday afternoon, and you’re excited to start your weekend! There’s only one thing left to do – your weekly status report. You already track all your work in Jira and Confluence, so creating a separate report sure feels like unnecessary work. Why can’t your boss just look in the Atlassian tools to see what you’ve done?
The answer is that Jira data is a continuously moving target. As soon as data is created or updated, changes also propagate across dashboards, boards, and built-in reports. This is great when you need real-time data, but what about when you need a static report for historical tracking purposes?
With Jira Snapshots for Confluence, you can simply take a snapshot of Jira data and display it in Confluence. No need to export information, manually create a time-consuming report, and email it to your manager. With the Jira Snapshots macro for Confluence, you can display a time-stamped, static snapshot of Jira issue data.

How to Do It:
-
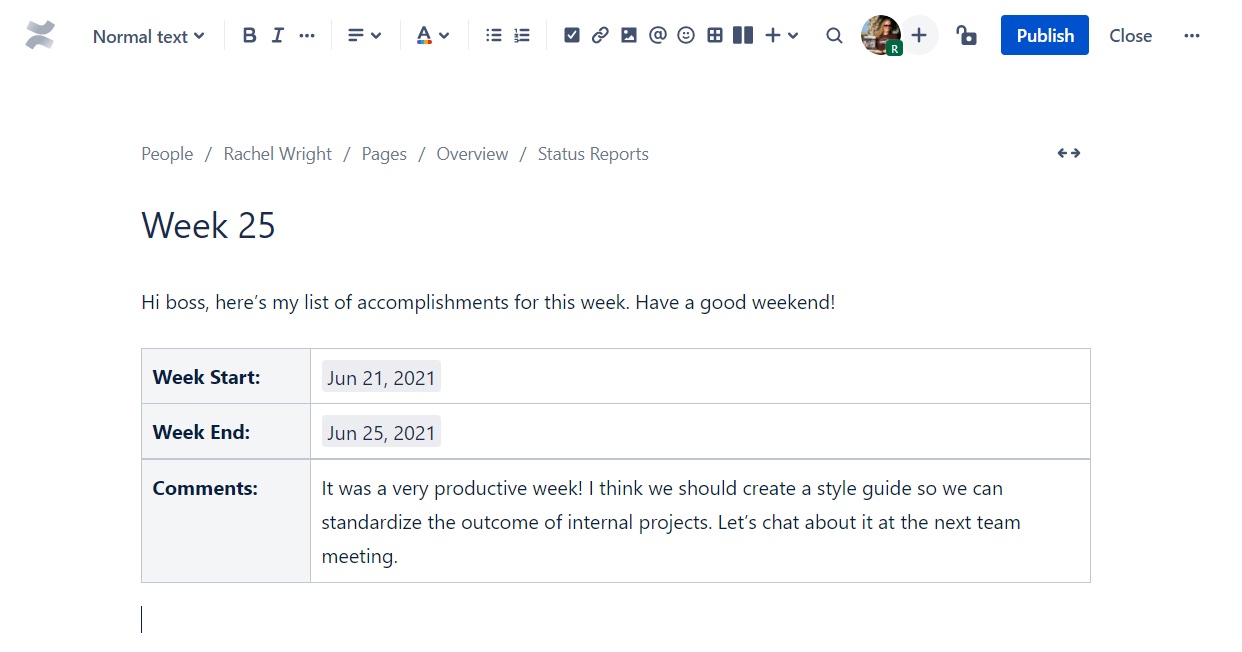
Log in to Confluence, and create a new page for the status report.
-
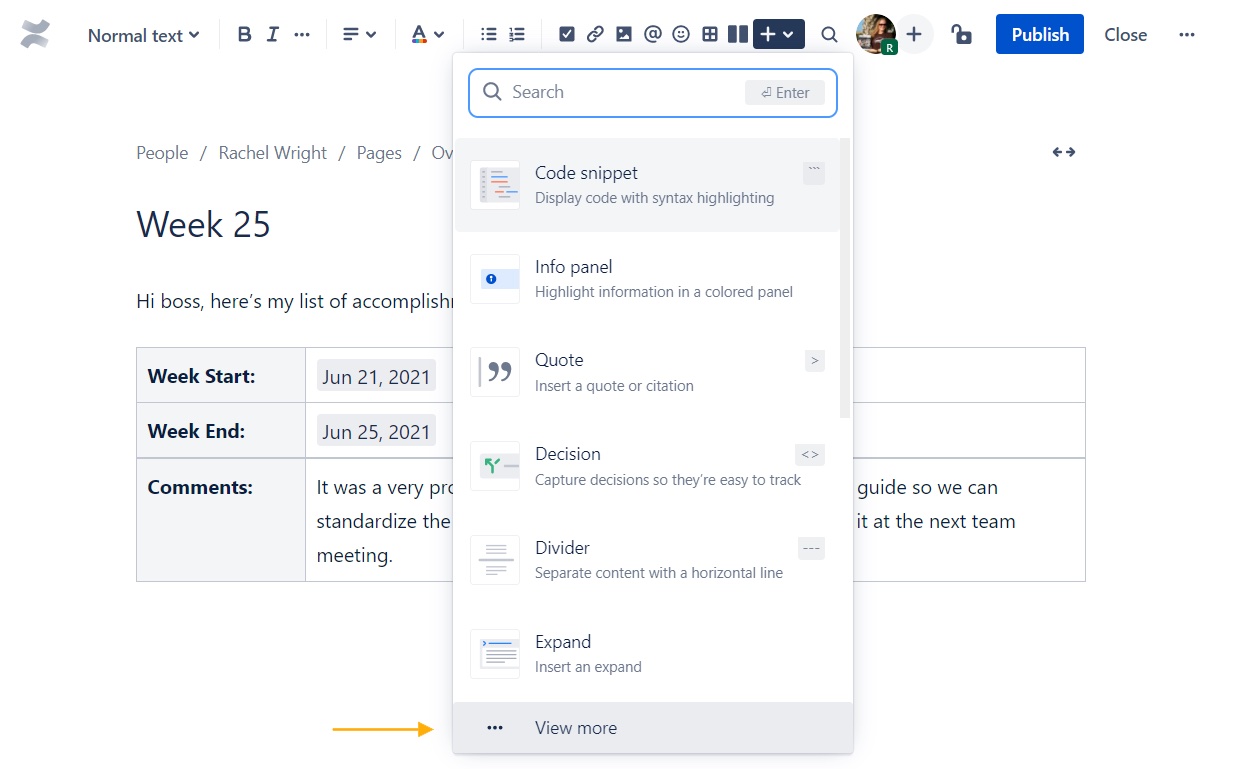
In the top editor toolbar, click the “+” icon and select “View more” at the bottom of the menu.
-
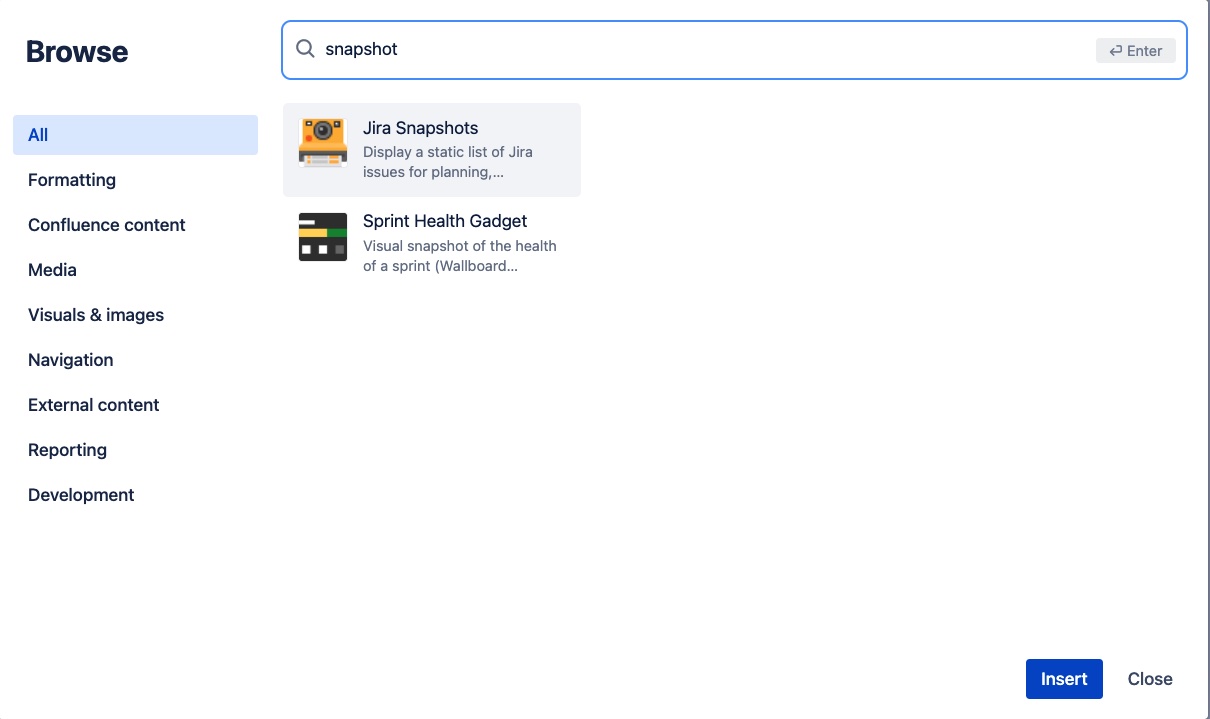
In the overlay, select the “Jira Snapshots” macro. You can find this macro via the search box at the top right.
-
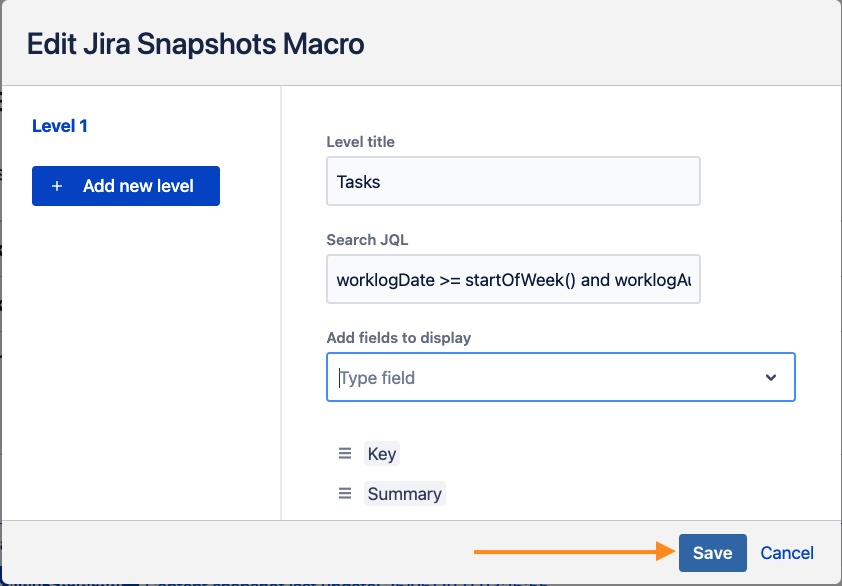
In the “Edit Jira Snapshots Macro” overlay:
-
Enter a title in the “Level title” field to represent the first level or “list” of Jira issues.
-
Enter a query in the “Search JQL” field to limit the scope of issues. For example, select only issues for which you have a logged time during the last week
-
worklogDate >= startOfWeek() and worklogAuthor = 557057:c0f3ae55-…… -
557057:c0f3ae55-…… stands for your user unique ID in Jira. ( see more here )
-
-
In the “Add fields to display” field, select the list of desired fields.
-

-
-
-
Click the “Save” button at the lower right, to complete the macro configuration.
-
-
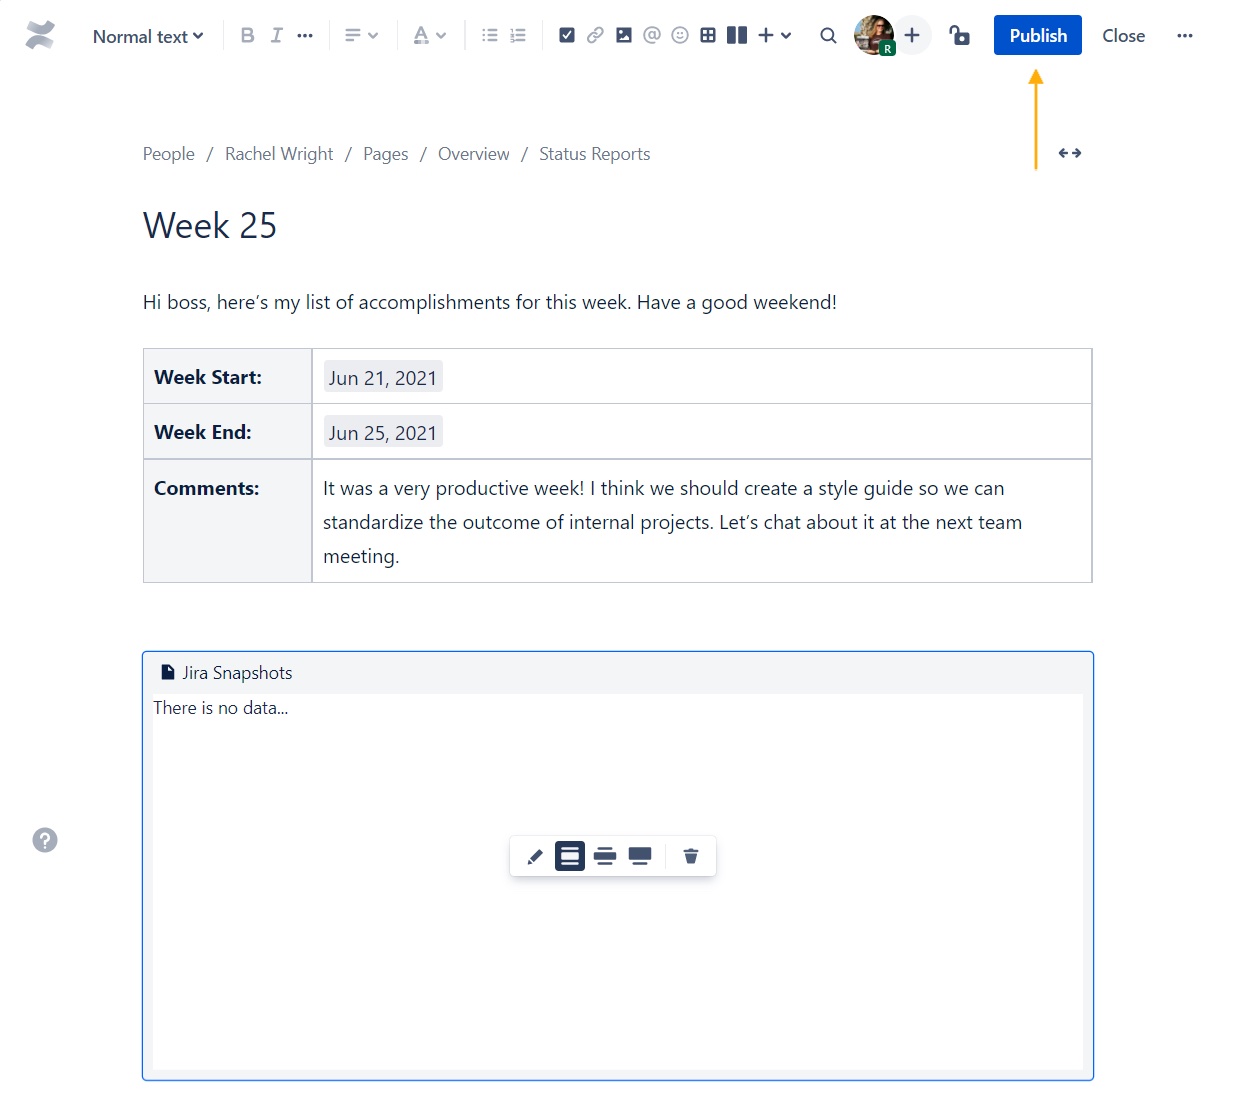
Click the “Publish” button at the top right of the page.
-
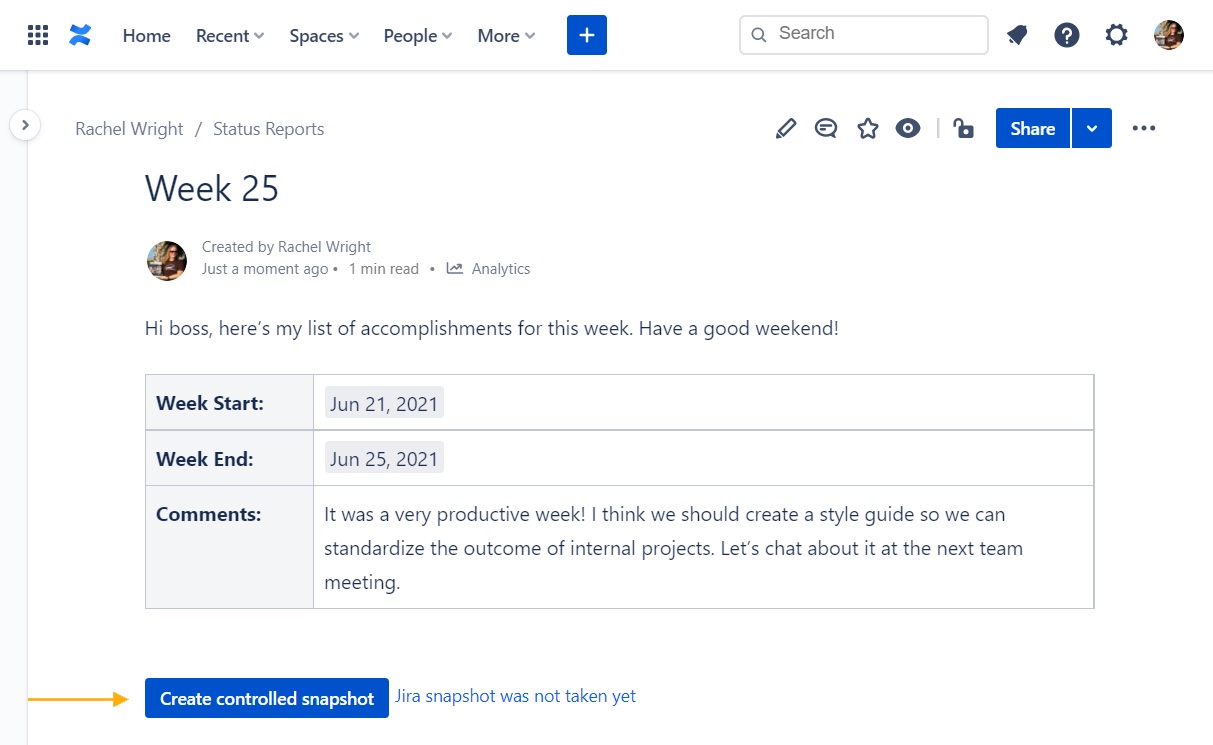
Finally, click the “Create controlled snapshot” button, to generate a static list of issues.
The Finished Result:
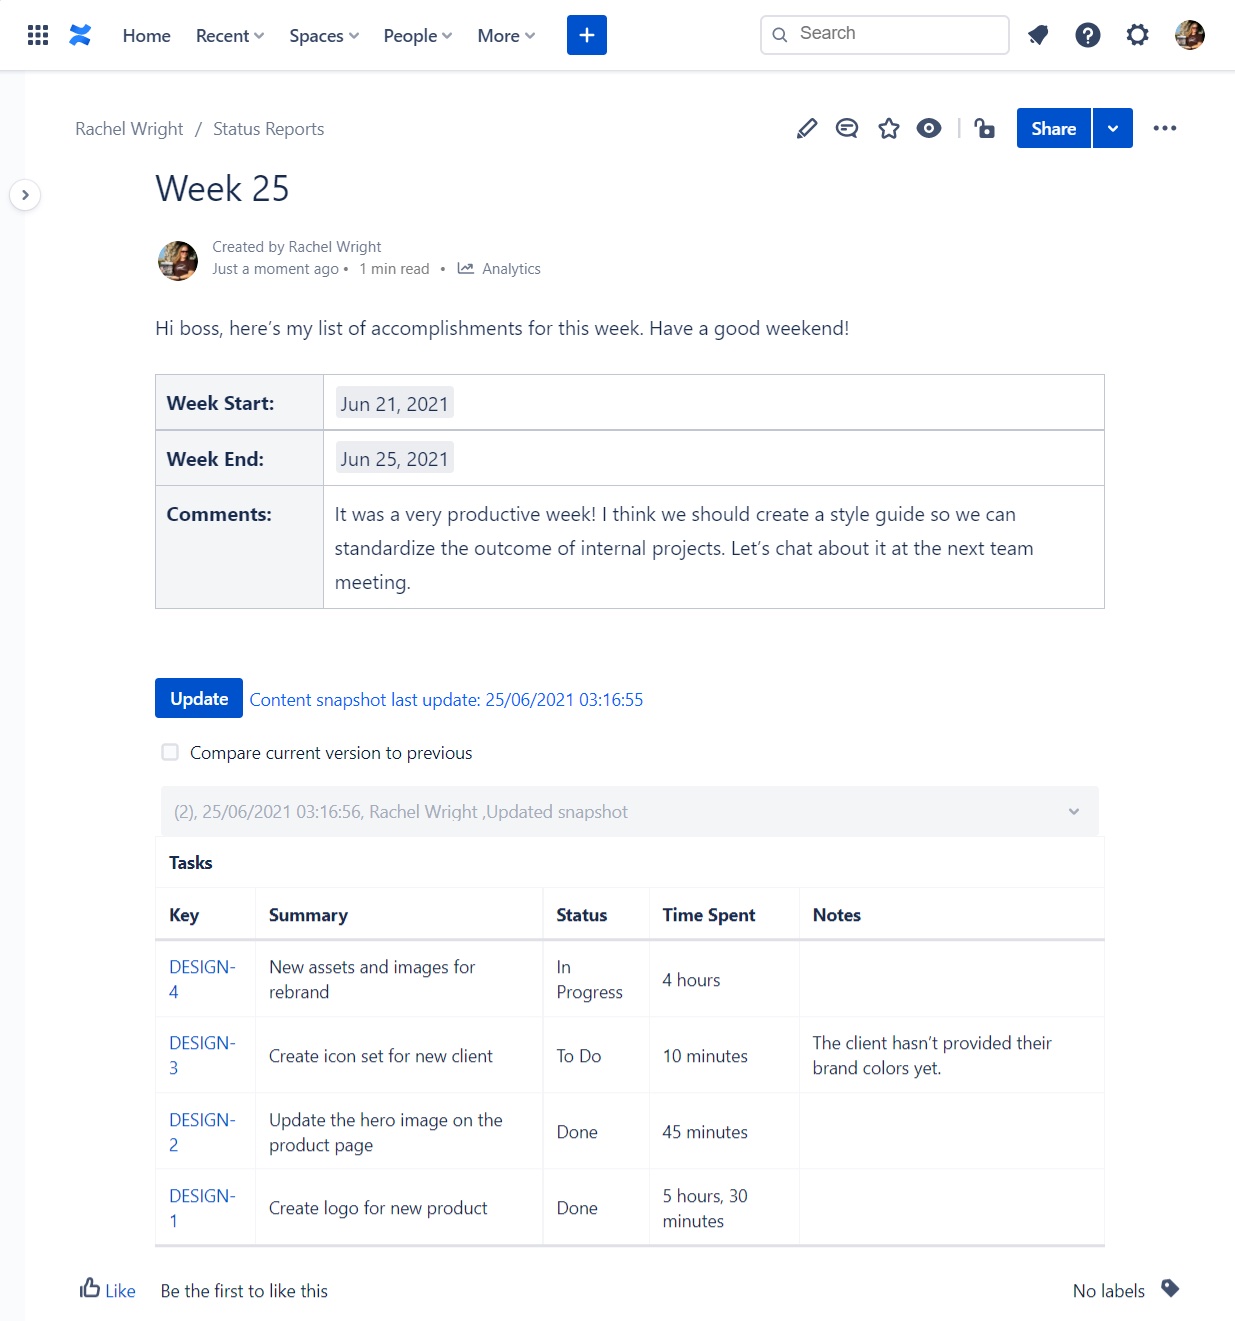
Need to change the issue list or display different information? Simply edit the macro details, and click the “Update” button on the Confluence page to take a new snapshot.
Now that there’s a trackable history of actions over time, your boss can see exactly what was done, and you can get an early start to your weekend!
Tips
-
Jira Snapshots supports most Jira standard and custom fields. In the screenshot example, we’ve displayed a custom text field, called “Notes,” to share some additional task information. If your Jira application doesn’t have a similar field, ask your Jira administrator to add it.
-
JQL:
-
Select only issues for which you have a logged time during the last week. Do the search in Jira first to quickly find your userid
-
worklogDate >= startOfWeek() and worklogAuthor = 557057:c0f3ae55-…… -
-