This is the standard authoring flow: start in Confluence, add the Snapshots macro to a page, configure it with a JQL search, and take the first snapshot. Use this flow when you're building a Confluence page that should include Jira data alongside your written content.
By the end of this page, you have a Confluence page with a Snapshots macro configured against a Jira search and populated with the data from your first snapshot.
Before you start
-
Snapshots and Access Agent are installed. See Installing Snapshots and Access Agent.
-
A JQL search ready that returns the issues you want to capture. The simplest way is to run the search in Jira first, copy the JQL string, and paste it during configuration. See Jira JQL cheat sheet if you need a refresher.
1. Create a Confluence page
In your target Confluence space, create a new page. Give it any title (for example, "Open issues"). Add whatever surrounding free text you want — Snapshots only takes over the spot where you place the macro.
2. Insert the Snapshots macro
In the page editor, where you want the snapshot to appear, type / (slash) followed by the macro name:
/snapshots
Two macros appear: Snapshots and Snapshots Test Report. Select Snapshots.
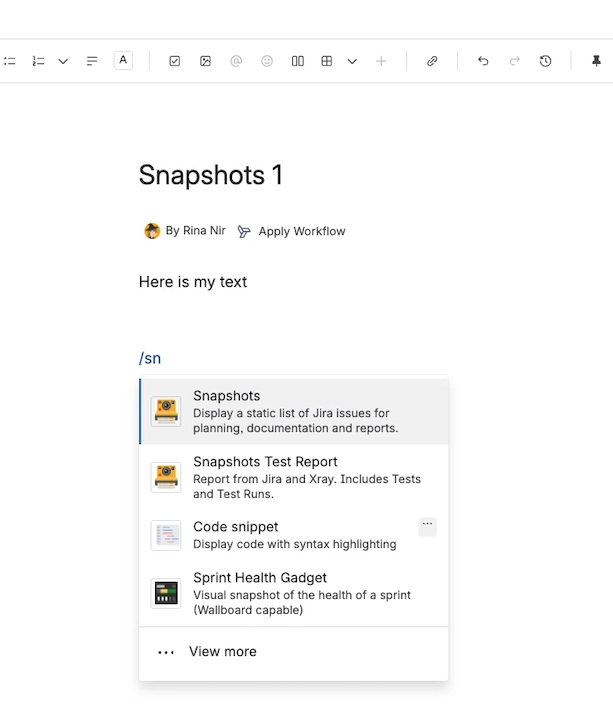
The macro configuration panel opens.
3. Configure the snapshot
For your first snapshot, configure a single-level (flat-table) snapshot:
-
Level title. Give the table a header — for example, "Open issues."
-
Search JQL. Paste your JQL string — for example,
project = DEV AND resolution = unresolvedto capture all unresolved issues in the DEV project. To verify the JQL, click Quick search: Snapshots runs it and shows how many issues will be retrieved. Confirm the count matches what you'd expect to see in Jira. -
Fields. A default set is proposed (typically Key and Summary). Add the fields you want to display — for example, Issue Type, Status, Description, and any custom fields you use.
-
Field order. Drag fields into the order you want them displayed. For example: Type → Key → Summary → Status → other fields.
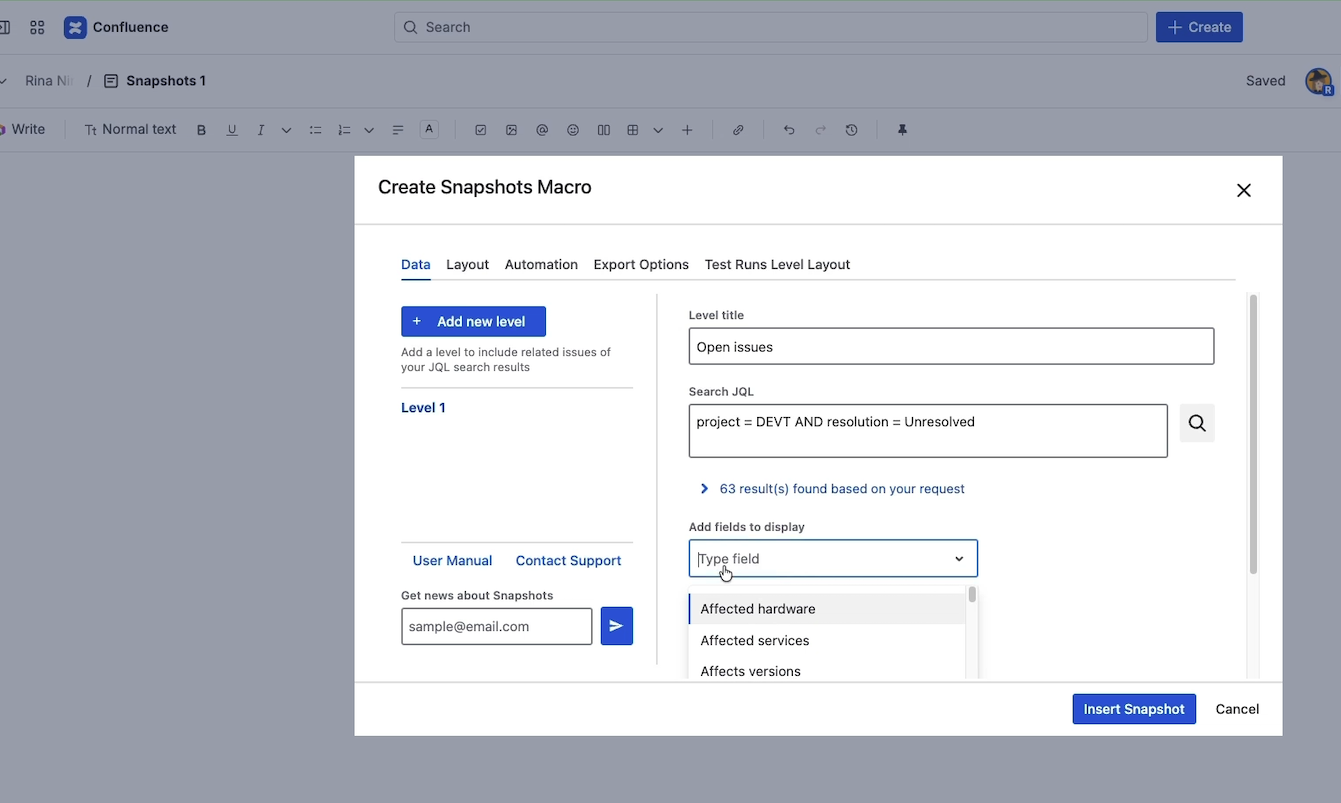
The list of fields available to add includes every field defined in your connected Jira, including custom fields.
4. Insert the macro and publish the page
Click Insert snapshot. The macro appears in your page with a placeholder where the snapshot data will render.
You can resize the macro on the page if you've added many fields and want a wider display.
Click Publish to publish the page.
5. Take your first snapshot
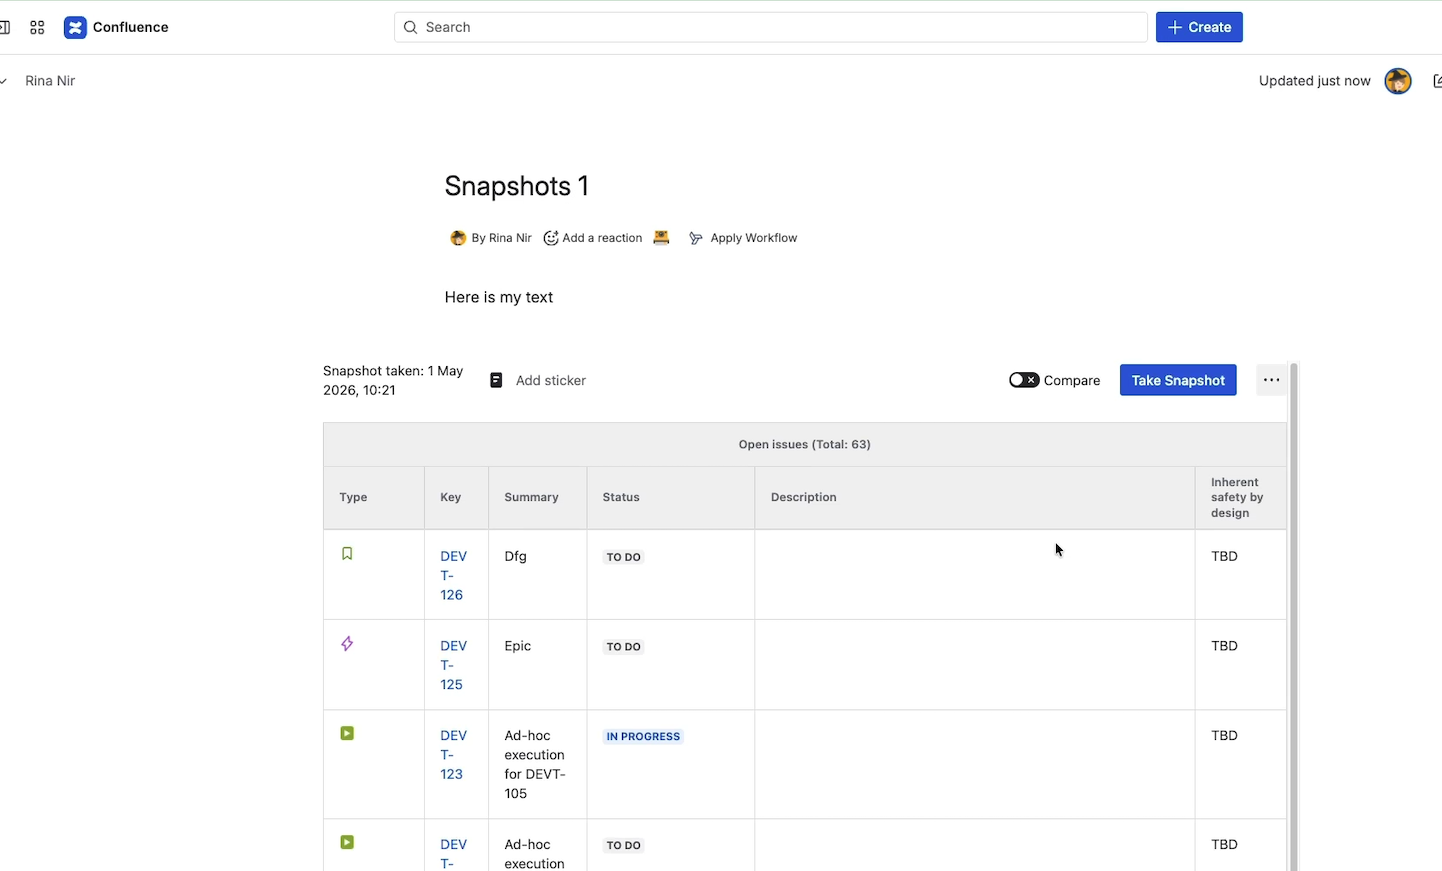
After publishing, Snapshots prompts you to take the first snapshot. Click Take snapshot in the prompt.
A progress bar shows how many issues are being retrieved. This usually takes a few seconds.
When the snapshot finishes, the macro renders a table with the data captured from Jira at the moment of the snapshot.
Customizing the snapshot
To change the snapshot configuration later, edit the page and click on the Snapshots macro:
-
Add or remove fields from the available list.
-
Reorder fields.
-
Change the level title.
-
Adjust the JQL.
Republish the page after editing. Snapshots offers to take a new snapshot when you republish; accepting captures the data again with the updated configuration.
Refreshing the data
A snapshot is a static capture of Jira data at a specific moment. Changes you make in Jira after the snapshot don't appear on the page automatically.
To get the current Jira data into the page, take a new snapshot. Open the page and click Take snapshot. Snapshots fetches the current data from Jira and adds a new page version with the updated table.
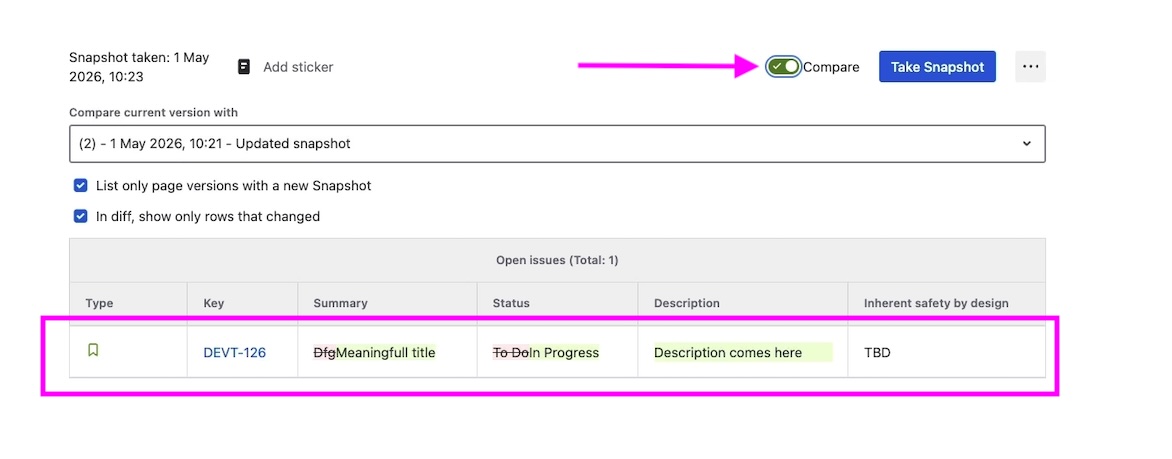
To see what changed between snapshots, use Compare on the page. See Comparing snapshots over time for the comparison interface.
What's next
-
Configuring multi-level snapshots — show parent/child relationships across linked issues, not just a flat list.
-
How snapshots work — the concepts behind the static-data model, page versioning, and the JSON attachment that holds your data.
-
Taking a snapshot from Jira — the alternative shortcut flow that starts from a Jira search.