The fastest way to see Snapshots in action is to start from Jira. Build a search that returns the issues you want, and have Snapshots create a Confluence page from it in one click.
By the end of this page, you have a Confluence page containing a snapshot of the Jira issues your search returned.
Before you start
-
Snapshots and Access Agent are installed. See Installing Snapshots and Access Agent.
-
A Confluence space ready for the new page. You'll choose the space during the steps below.
1. Build your Jira search
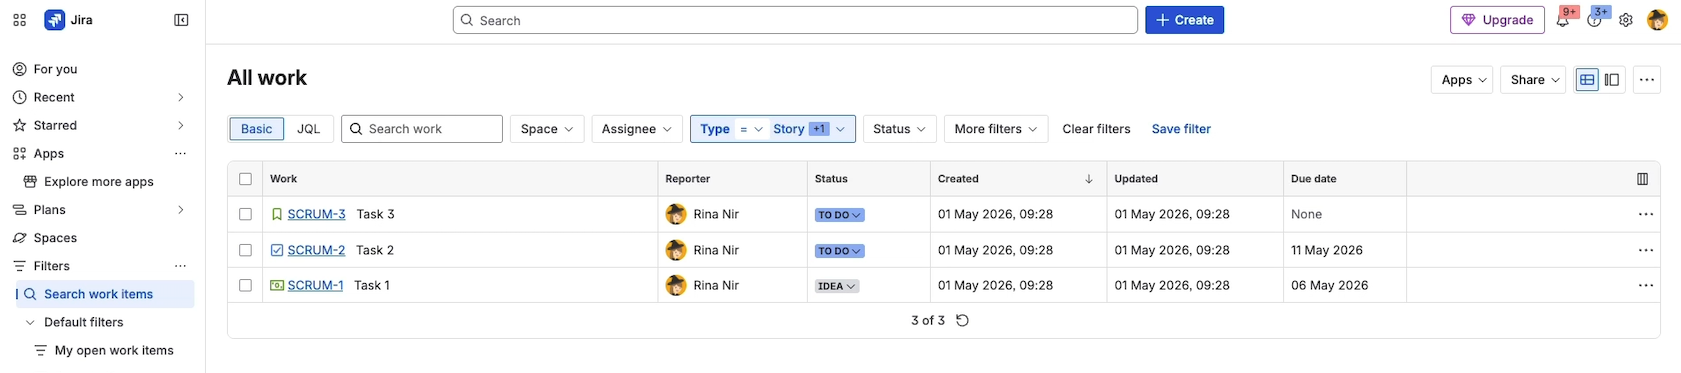
In Jira, open Filters → Search work items. Either select an existing filter or define your own — issue types, projects, status, date range, and so on.
Adjust the columns shown on the search results to include only the fields you want to appear in the snapshot. Whatever you see in the search columns is what the snapshot will display.
Note: Changing the filter or columns later (after taking the snapshot) doesn't change the snapshot. The snapshot captures the search result as it was at the moment you take it.
2. Open the Take Jira snapshot dialog
On the Jira search screen, click the Apps dropdown menu and choose Take Jira snapshot.
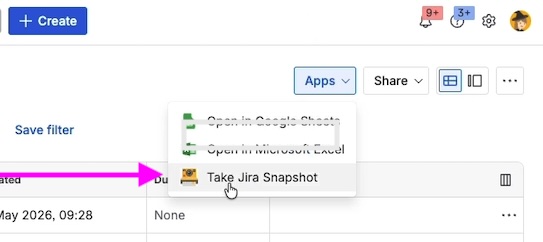
A dialog opens with the snapshot configuration.
3. Configure the snapshot
In the dialog:
-
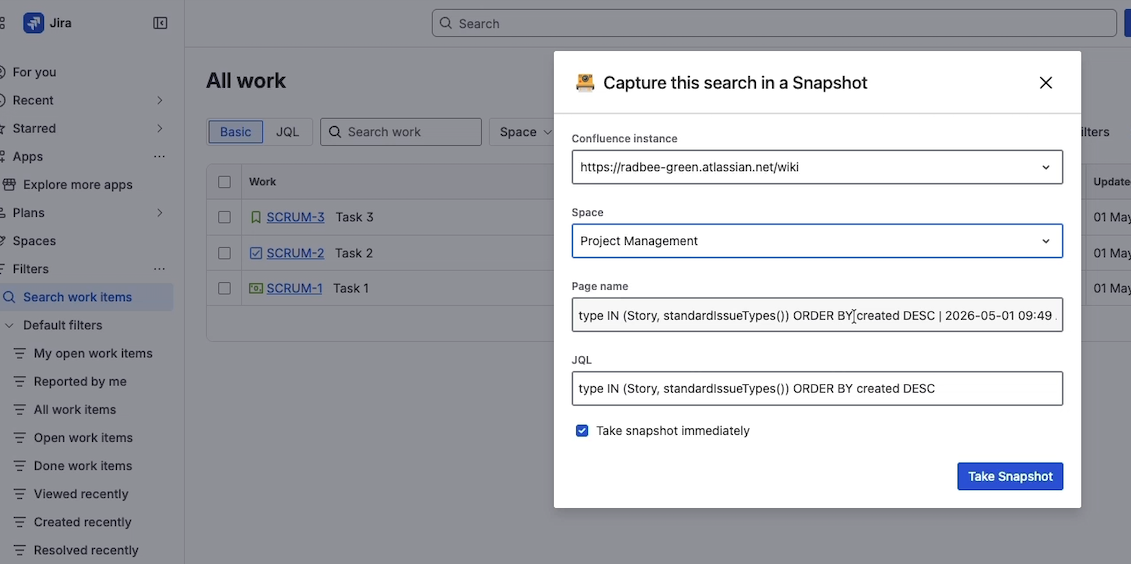
Confluence site. Snapshots fills in the Confluence site connected to this Jira. If your setup connects to multiple Confluence sites, choose the right one here.
-
Space. Select the Confluence space where the new page will be created.
-
Page name. A default name is suggested; edit it to whatever makes sense for the report.
-
JQL. The Jira Query Language expression that drives the snapshot. It is pre-filled from your search and you usually don't need to change it.
-
Take snapshot immediately. Leave this checked (the default) so that the new page is populated with data right away. If you uncheck it, the page is created with the macro configured but no data — you'd take the first snapshot manually later.
4. Take the snapshot
Click Take snapshot. Snapshots creates the new page in Confluence and populates it with the data from your search. This takes a few seconds.
5. Verify the result in Confluence
Open the Confluence space you chose. The new page is at the top of the space.
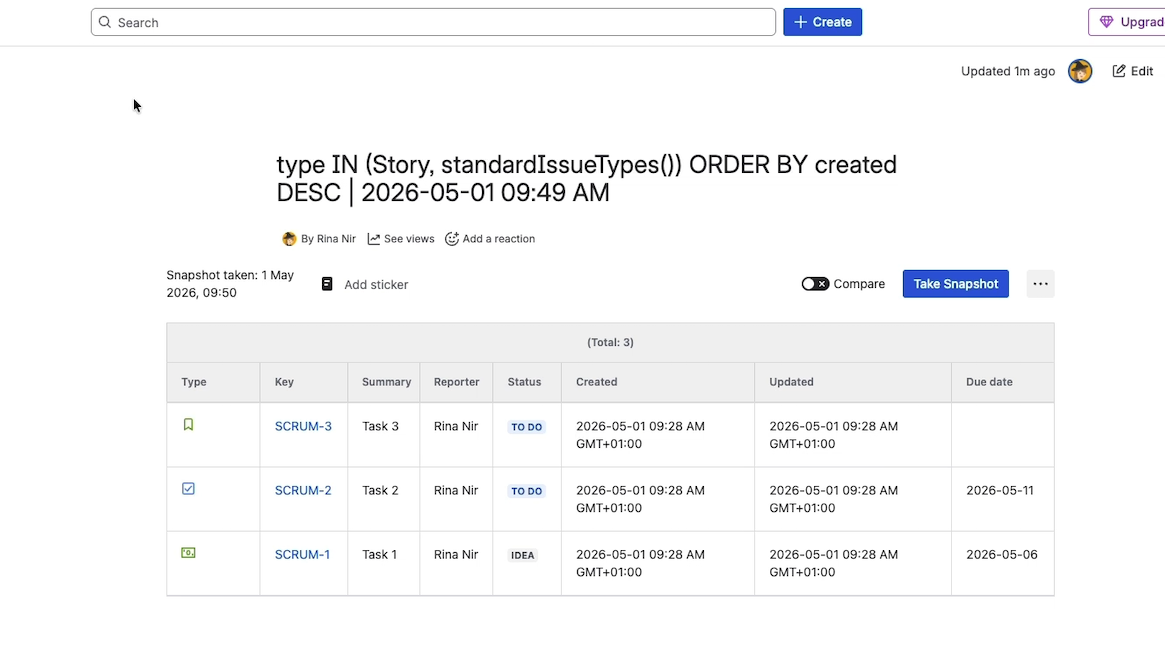
The page contains a single Snapshots macro with one level — a flat table of issues. The columns match the columns you saw in Jira, and the rows are exactly the issues your search returned.
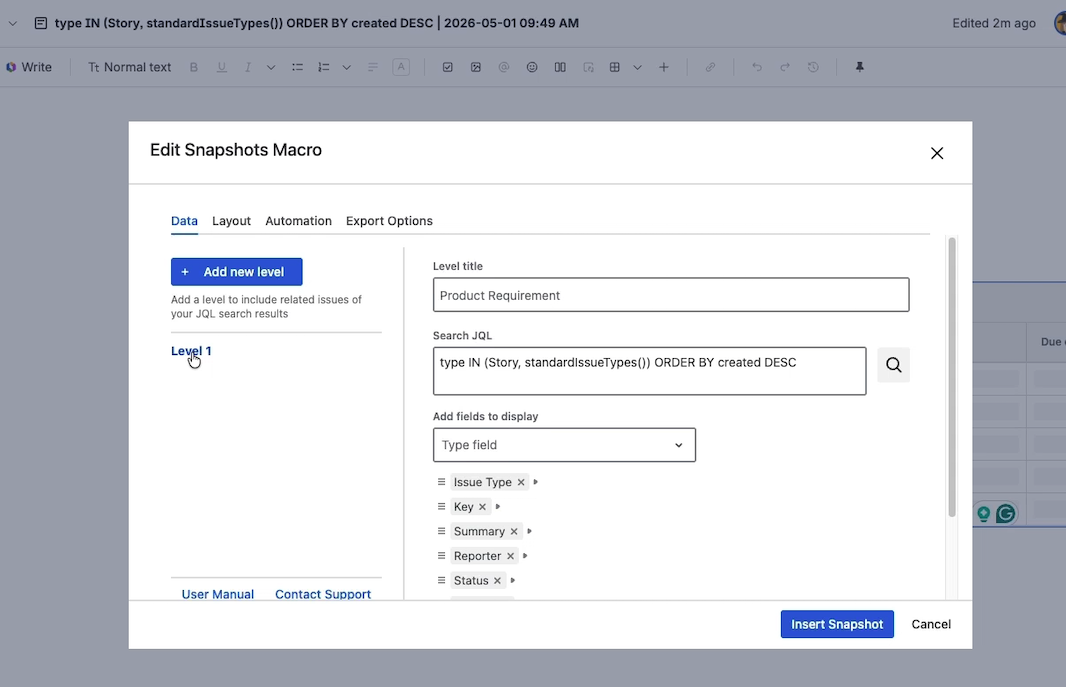
Customize the snapshot
To tweak the snapshot's appearance, edit the page and click on the Snapshots macro:
-
Reorder fields by dragging them in the field list.
-
Add a level title (for example, "Search query") to give the table a heading. The title appears immediately in the snapshot once you republish.
-
Add or remove fields from the available Jira fields list.
Republish the page after editing. Snapshots automatically creates a new page version each time the configuration changes.
What just happened
When you took the snapshot, Snapshots:
-
Created a new Confluence page with the macro configured against your JQL.
-
Created a second page version populated with the data from your search.
-
Stored the actual Jira data as a JSON attachment on the page.
For more on how snapshots are stored, versioned, and compared, see How snapshots work.
What's next
-
Taking a snapshot from Confluence — the alternative authoring flow, where you start by adding the macro to a Confluence page.
-
Configuring multi-level snapshots — show parent/child issue relationships, not just a flat list.
-
Comparing snapshots over time — see what changed between two snapshots of the same page.