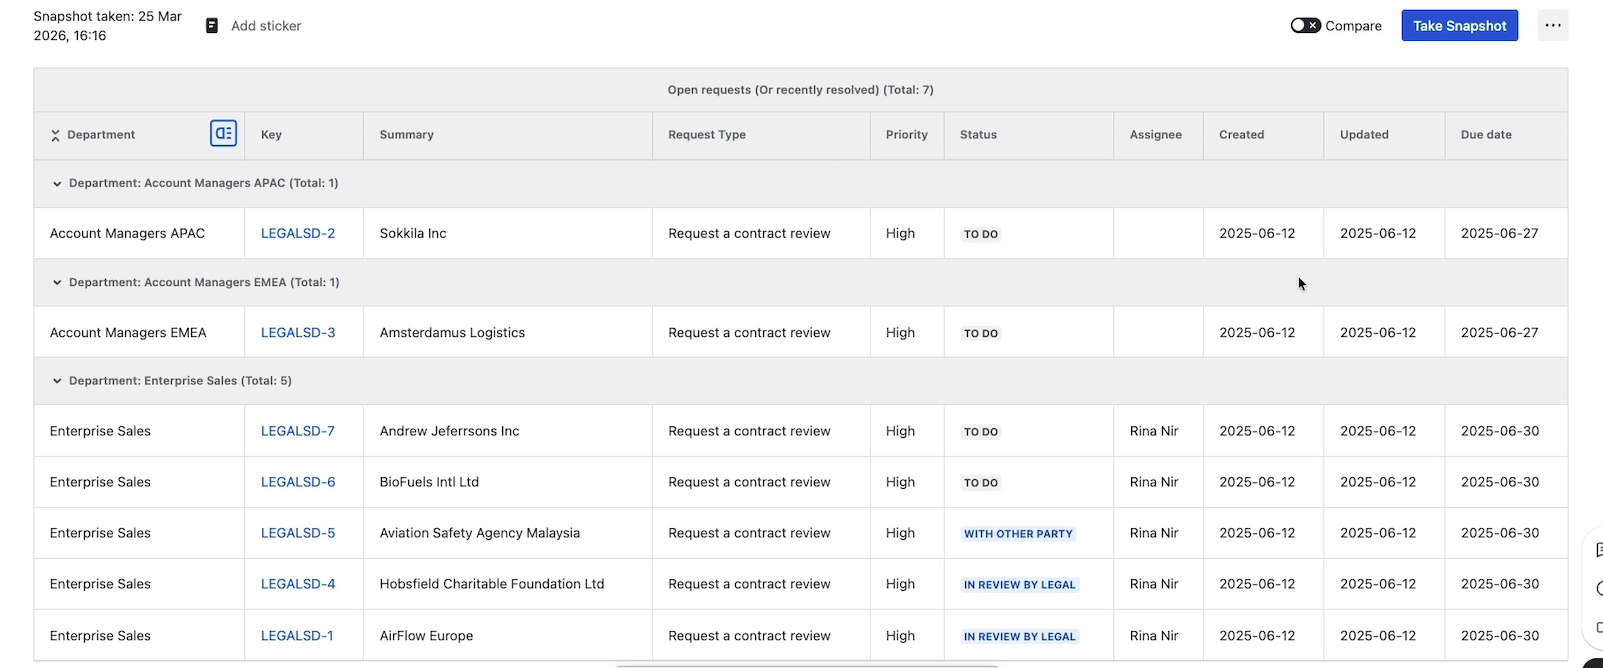
Grouping breaks a snapshot's level-1 rows into sections based on the value of a single field. Each section can show a header with the field value and the matching rows underneath, optionally collapsed by default. Use grouping when page viewers benefit from seeing the data sliced — for example, support tickets grouped by department, work items grouped by priority, requirements grouped by component.
By the end of this page, you have a grouped snapshot, configured to either show the group column or hide it.
Constraints
-
You can group on one field at a time. There's no multi-field grouping.
-
The grouping field must come from level 1. You can't group by a level-2 or deeper field.
-
Grouping is configured per macro. Once set, every render of the snapshot shows the same grouping.
A page viewer can apply ad-hoc grouping at view time without changing the macro configuration — see Sorting, filtering, and grouping on the page — but that grouping is non-persistent.
1. Choose a field to group by
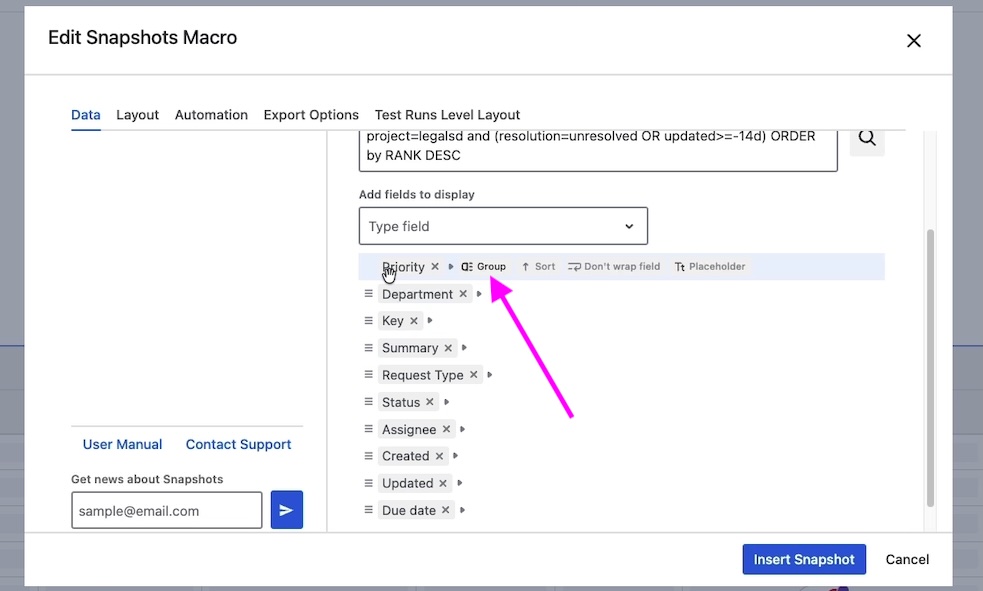
In the macro configuration, hover over the field in the level-1 field list and click Group. The whole table will be grouped by that field's values.
To remove grouping, hover over the field again and clear the grouping option. A snapshot with no grouping is the default.
2. Configure how groups display
|
Setting |
What it does |
|---|---|
|
Expanded by default |
When the page renders, all groups appear expanded — every row is visible. The page viewer can collapse individual groups manually. |
|
Collapsed by default |
When the page renders, each group shows as a single row with the group value. Page viewers click into a group to see its rows. |
|
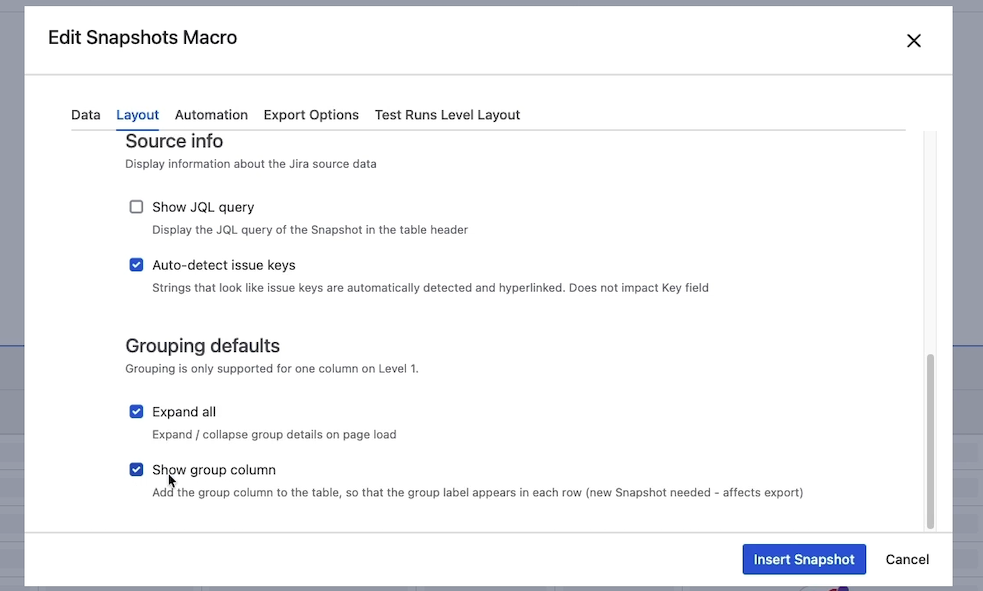
Show group column |
When ticked (the default), the field used for grouping appears as its own column in the table as well as in the group header. When unticked, the column is hidden — useful for keeping wide tables narrower, since the group header already shows the value. |
Choose the combination that fits the page viewer's task. Collapsed-by-default works for long tables that page viewers scan; expanded works for short tables where the grouping is just an organizing aid.
3. Save and view
Click Insert snapshot and republish the page. Group headers appear in the table, and the rows are sliced into the corresponding sections.
What's next
-
Sorting, filtering, and grouping on the page — page viewers can apply ad-hoc grouping at view time without changing the macro.
-
Field options: sort and don't-wrap — combine grouping with a default sort to control row order within each group.
-
Display options on the Layout tab — the rest of the Layout tab settings.