
Text rows are rows of your own text that you can insert between Jira rows in a snapshot table. Use them for context notes, callouts, section headers, warnings, or any information that belongs in the report but doesn't live in Jira itself.
Text rows are part of the Dress-ups group. Like other dress-ups, they sit on top of your Jira data without changing it, are saved with the snapshot, and are visible to every page viewer.
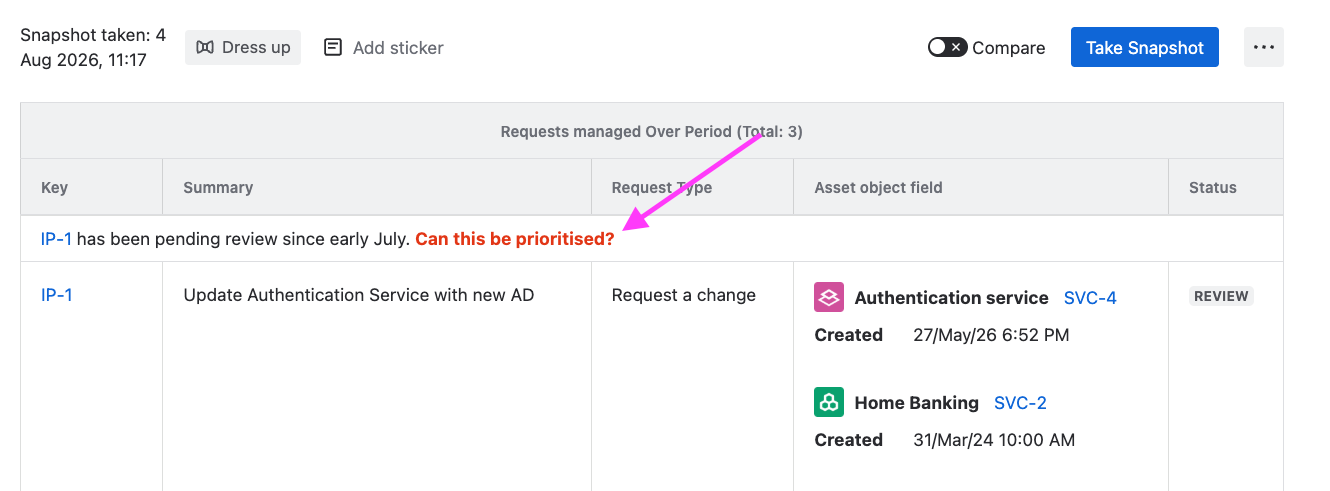
Where a text row can go
Every text row is pinned to something in the table, so it always appears in a fixed position relative to that anchor:
-
Above a Jira row. The text row appears directly above the selected Jira row.
-
Below a Jira row. The text row appears directly below the selected Jira row.
-
Below the header. The text row appears at the very top of the data area, just below the column headers.
A pinned text row moves with its anchor. If you later reorder Jira rows using manual row ordering, a text row pinned to a Jira row moves with it. A text row pinned below the header stays at the top of the data area regardless of reordering.
Adding a text row
-
Click Dress up above the snapshot to enter dress-up mode. You start in text-row mode by default.
-
Hover over a Jira row to see the Pin text row above and Pin text row below icons. Hover over the header row to see the Pin text row below the header icon.
-
Click the icon at the position you want. A new empty text row appears there.
-
Type your text into the row.
-
When you're done, click Save.
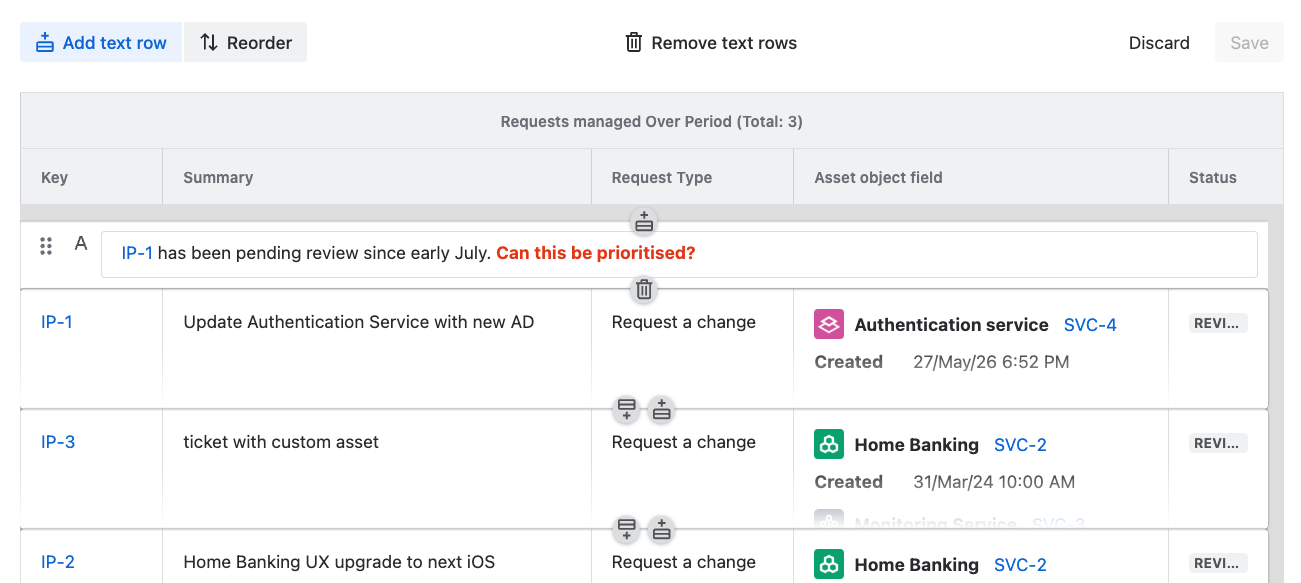
Formatting your text
By default, text is entered as plain text. To apply formatting like bold, bulleted lists, or headings, click Show formatting options on the text row to reveal the formatting toolbar.

Moving a text row to a different Jira row
To re-pin a text row to a different Jira row:
-
In dress-up mode, drag the text row's handle.
-
Drop it in the new position (above or below the target Jira row). A tooltip during the drag shows where the text row will land (Pin above or Pin below).
Removing text rows
To remove a single text row, click the trash icon on the row (visible in dress-up mode).
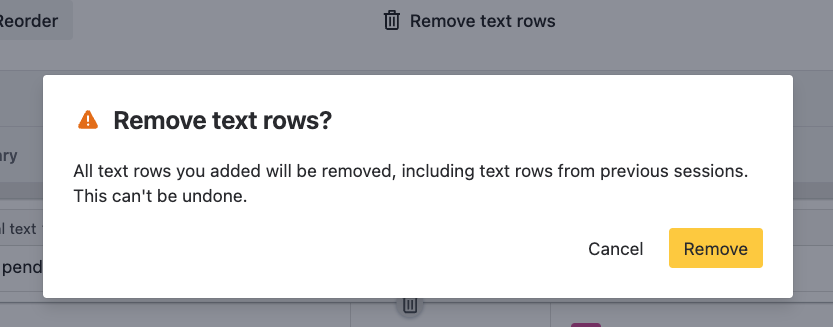
To remove all text rows from the snapshot at once, in dress-up mode click Remove text rows. A confirmation dialog appears:
How text rows behave with new snapshots
A text row pinned to a Jira issue stays pinned to that issue on every new snapshot, as long as the issue is still returned by the snapshot's JQL.
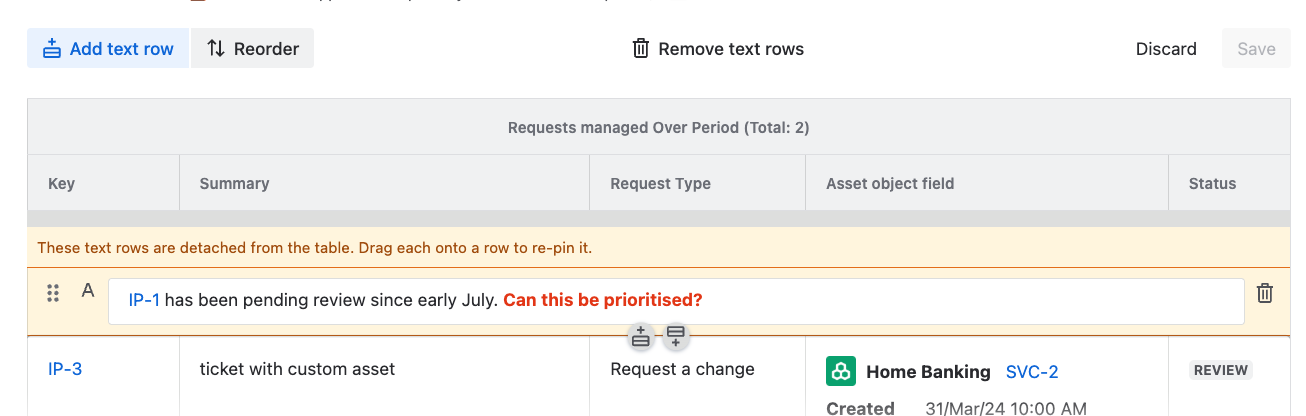
If a Jira issue with a text row pinned to it is no longer returned by the JQL, the text row becomes an orphaned text row. You'll see:
-
A yellow warning indicator at the top of the snapshot with the message text row detached and a warning icon.
-
The dress-up indicator highlighted in yellow.

When you enter dress-up mode, orphaned text rows appear at the top of the table with a yellow highlight. Drag and re-pin them to other Jira rows to keep them.
Important: if you don't re-pin an orphaned text row before the next snapshot is taken, it is permanently removed. The window to preserve orphaned rows closes when the next snapshot runs.
What's next
-
Using dress-ups. The full picture of what dress-ups are and how they work.
-
Ordering rows manually. The other feature in the Dress-ups group.